Here is a step by step guide which introduces an easy and fast way to play WAV on iPhone, WAV on iPod, and WAV on iPad from iTunes.With the popularity of Apple iPhone, iPad, and iPod, most Apple fans and audiophiles like to listen to the high-quality music on the loved Apple device and iTunes, thus we always need to download and import other music to iTunes. Can iTunes play WAV files? WAV is an audio file format that was developed by Microsoft, which is so wide spread today that it is called a standard PC audio file format. And iTunes supports five different audio formats. You can see them by choosing iTunes > Preferences, clicking the General tab, then clicking Import Settings. iTunes now can read, write and convert between MP3, AIFF, WAV, MPEG-4, AAC and Apple Lossless (.m4a). Though iTunes announced to support WAV audio file, you will be disappointed when adding WAV to iTunes, and and you may find the web is swarmed with similar queries like "Why iTunes won't play WAV somtimetimes" or "How to add WAV to iTunes". Continue reading this article you will get two effective solutions to convert WAV audio to iTunes for sycing/playing as below. Solution 1 - Use a third-party video converterIf you want to import WAV to iTunes with the quality of WAV audio intact, you can convert WAV to Apple's friendly lossless m4a. If you prefer to smaller file size rather than quality, you can convert WAV to a more common format like MP3 to gain more compression rate and smaller file size. Whether you want to convert WAV to M4A or MP3, Dimo Video Converter Ultimate for Mac can help you do the job. Key Features of the Utility:* Convert iTunes unrecognized WAV to M4A, AIFF, AAC, WAV, MP3, etc to help you open WAV in iTunes (12.5.5);* It supports converting many uncommon audio formats in order to help other Apple users to play them in iTunes, QuickTime, iPhone, iPad, iPod, Final Cut Pro, etc;* In addition to WAV, it enables you convert iTunes and other Apple devices and players incompatible OPUS, AC3, OGG, OGA, WMA, XWM, 3GA, M4A, M4B, MKA, RA, RAM, APE, AU, AUD, AIFC, CAF, MPC, QCP, VOC, VOX, GSM, etc or video files like WMV, AVI, MP4, MKV to MP3, AIFF, WAV, etc for playback;* Besides working as a super helper for Apple users, it also allows you to convert audio files so that you can play them in Android, BlackBerry, Xbox serious, PlayStation serious and so on;* You can optimize WAV and other audio files before converting them or importing them into popular devices and players with built-in audio editing tools.* For Windows PC users, here is the windows version which is compatible with Windows 10/8.1/8/7/Vista/XPFree Download Dimo Video Converter Ultimate for Mac/Win:
 Other Download:
Step by Step Guide on How to Convert and Import WAV to iTunesStep 1 Add WAV filesAfter downloading, you can install and run the WAV to iTunes Converter. To load WAV files to this app, you can go to "Add File" from the main menu to browse your hard disk to select the WAV audio files. Also, you can directly drag one or several WAV files to the software, it won't take you too long until. If you want to be more cautious, you can always make a duplicate folder of your master copies. It is always a good practice to have a back-up.
Other Download:
Step by Step Guide on How to Convert and Import WAV to iTunesStep 1 Add WAV filesAfter downloading, you can install and run the WAV to iTunes Converter. To load WAV files to this app, you can go to "Add File" from the main menu to browse your hard disk to select the WAV audio files. Also, you can directly drag one or several WAV files to the software, it won't take you too long until. If you want to be more cautious, you can always make a duplicate folder of your master copies. It is always a good practice to have a back-up.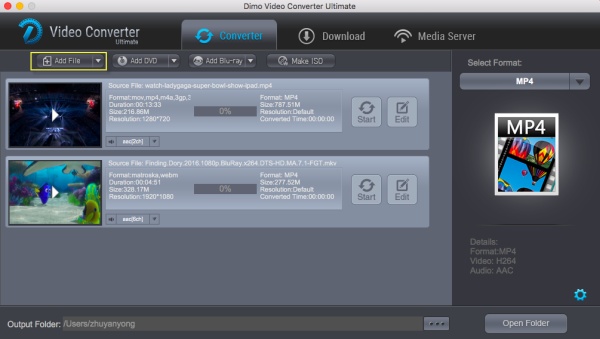 Step 2 Set output formatClick "Select Format" drop-down button to choose "MP3", "AIFF" or etc as output formats from "Format > Audio" category. If you care about the quality of the output file, just choose "WAV" or "M4A" as output format from "Format > Audio" category. An MP3 tends to offer a higher room of flexibility in the situation that you might want to share those audios with family or friends that happen to use non-Apple devices, whereas an M4A might still be subjected to the DRM.At this time, you can also set output directory, so you can get the output files as soon as the conversion is finished. To do this, you need to click "..." of the program window to specify the output folder.Step 3 Edit before converting WAV files to iTunes (Optional)Simply skip this step if you don't want to edit your audio files. Or else, click on the "Edit" button on the right-hand side of the uploaded audio file to access the editing screen.Step 4 Modify Audio Parameters (Optional)Before starting conversion, advanced users are allowed to modify audio parameters. Open Settings Window, you can change audio bitrate, encoder, audio channel and sample rate.
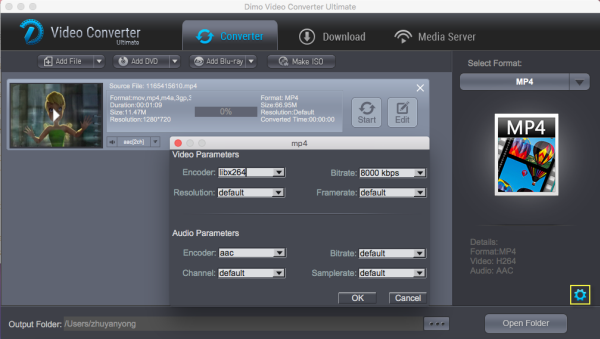 Step 5 End the conversionIn the end, just click the conspicuous "Start" button to perform WAV iTunes conversion efficiently on Mac/Windows PC. The process will take you some time, which mainly depends on the size of all imported WAV files and the performance of your computer.Now, you can really play WAV on iTunes, just drag and drop the output files (.mp3 files) from the output folder to iTunes music library. You can also sync WAV to iPhone 7 Plus, iPhone 7, iPhone 6S/6S Plus/6/6 Plus/SE/5S/5C, iPad Air 2, iPad Mini 4/3, iPod Touch 6, etc. via iTunes. In this way, you'll find you can import the WAV files to iTunes library and even sync to Apple devices without any limitation.Tip: For new iTunes 12.5.5, there's little difference with the previous version. You can learn how to add audio files to iTunes in detail.1. Start iTunes 12.5.5.2. Click File > Add File to Library.3. Click View and select Music, then your music library will be presented.4. Click Songs and now you can find your transferred MP3 audio. In this interface, you can also directly drag and drop local audio files.The following is a step by step guide that tells you how to transfer the converted WAV file into Apple TV via iTunes.Step 1 Import the converted WAV files into iTunes.Step 2 Make your Apple TV discoverable by your iTunes on computer. Go to your Apple TV to open "Settings" -> "Computers"- > "Connect to iTunes".Step 3 Find your Apple TV in iTunes. Open iTunes on your computer, go to menu -> "Preferences", click "Apple TV" and make sure "Look for Apple TVs" is selected. Close Preferences window.Step 4 Now, you will see your Apple TV in the main window. Select it and enter the passcode.Step 5 In the last step, go to "Summary" and select "Automatic Sync" or "Custom Sync" to finish transferring WAV to Apple TV.Solution 2– Use iTunesIn iTunes music library, iTunes could create a copy of a song in a new format, with the original file existing in original format. Also, it could import external songs and convert them to a new format at the same time, which creates a converted copy of file in iTunes music library.* Convert formats for songs inside iTunes:1. Open iTunes Preferences. Windows: Choose Edit > Preferences. Mac: Choose iTunes > Preferences.2. Click "General > Importing Settings…" button to invoke the "Importing Settings" window, on which click the "Import Using" drop-down button to choose the encoding format you want to convert the song to (e.g. select WAV Encoder if you want to convert iTunes songs to WAV format). Then click OK button.3. Select one or more songs in iTunes music library, then from the File > Create New Version menu, choose the versions you want to get (the menu item changes to show what's selected in your Importing preferences).* Convert external songs to iTunes via importing:To convert all the songs in a folder or on a disk to iTunes, hold down the Option key (Mac) or Shift key (Windows) and choose "File > Create New Version > Convert [import preference setting]". The Import preference setting will match what you chose in step 2 mentioned above. iTunes will prompt you for the location of the folder or disk you want to import and convert. All the songs in the folder or on the disk will be converted.Free Download or Purchase Dimo Video Converter Ultimate for Mac/Win:
 Need the lifetime version to work on 2-4 Macs so that your friends and family can instantly broaden their entertainment options? Please refer to the family license here.
  Kindly Note:The price of Dimo Video Converter Ultimate for Mac is divided into 1 Year Subscription, Lifetime/Family/Business License: $43.95/Year; $45.95/lifetime license; $95.95/family license(2-4 Macs); $189.95/business pack(5-8 Macs). Get your needed one at purchase page.Related Software:BDmate (Mac/Win)Lossless backup Blu-ray to MKV with all audio and subtitle tracks; Rip Blu-ray to multi-track MP4; Convert Blu-ray to almost all popular video/audio formats and devices; Copy Blu-ray to ISO/M2TS; Share digitized Blu-ray wirelessly.DVDmate (Mac/Win)A professional DVD ripping and editing tool with strong ability to remove DVD protection, transcode DVD to any video and audio format, and edit DVD to create personal movie.Videomate (Mac/Win)An all-around video converter software program that enables you to convert various video and audio files to formats that are supported by most multimedia devices.8K Player (Mac/Win)A mixture of free HD/4K video player, music player, Blu-ray/DVD player, video recorder and gif maker. Contact us or leave a message at Facebook if you have any issues.Related Articles:
Source: How to Import and Play WAV on iTunes?
Kindly Note:The price of Dimo Video Converter Ultimate for Mac is divided into 1 Year Subscription, Lifetime/Family/Business License: $43.95/Year; $45.95/lifetime license; $95.95/family license(2-4 Macs); $189.95/business pack(5-8 Macs). Get your needed one at purchase page.Related Software:BDmate (Mac/Win)Lossless backup Blu-ray to MKV with all audio and subtitle tracks; Rip Blu-ray to multi-track MP4; Convert Blu-ray to almost all popular video/audio formats and devices; Copy Blu-ray to ISO/M2TS; Share digitized Blu-ray wirelessly.DVDmate (Mac/Win)A professional DVD ripping and editing tool with strong ability to remove DVD protection, transcode DVD to any video and audio format, and edit DVD to create personal movie.Videomate (Mac/Win)An all-around video converter software program that enables you to convert various video and audio files to formats that are supported by most multimedia devices.8K Player (Mac/Win)A mixture of free HD/4K video player, music player, Blu-ray/DVD player, video recorder and gif maker. Contact us or leave a message at Facebook if you have any issues.Related Articles:
Source: How to Import and Play WAV on iTunes?
If you can't transfer MP4 files to iTunes (iTunes 12), you should convert MP4 to iTunes supported format to play them smoothly on iTunes.Though iTunes announced to support MP4 video file, we often meet difficulty in adding MP4 to iTunes or in syncing MP4 files from iTunes to iPod, iPad, iPhone, Apple TV. The following article just aims to solve how to successfully import iTunes unsupported MP4 to iTunes so as to play MP4 in iTunes or sync MP4 to iPhone, iPad, iPod, Apple TV. iTunes can handle just about any file format that works with QuickTime and will play any file purchased or downloaded from the iTunes Store. If you've got video files that end with a .mov, .m4v, or .mp4 file extension, you can import them to iTunes with ease. However, the video especially the MP4 video must meet the following specifications: it must be encoded as 540 kbit/s (minimum) MPEG-4 video (H.264) with an approximately 128 kbit/s AAC audio track or encoded as 1.5 Mbit/s (minimum) MPEG-4 video (H.264) with a minimum 128 kbit/s AAC audio track. If not, you will fail to import MP4 to iTunes.Even if your MP4 files meet the above specifications like the encoder, bit rate, resolution, etc. and are added to iTunes successfully, it may still fail to sync to iOS devices because of incompatibility problem. For iPhones, iPads, and video-capable iPods play videos in more specific video formats and codecs. The solution to this common problem is to convert the MP4 video files to iTunes, because only a few audio/video formats are supported by iTunes. Converting your files to iTunes supported format will allow you to play your MP4 videos smoothly.To do this conversion, an intuitive program like the Dimo Video Converter Ultimate for Mac will be of great help. This tool can convert your MP4 videos to iTunes supported M4V, MOV without compressing the video quality. In addition, you can use this tool to make adjustments to the videos easily using a built-in editor. The Mac equivalence of MP4 to iTunes Converter is Dimo Video Converter Ultimate, which is well compatible with Windows 10. Read on and follow the step-by-step guidance below to convert MP4 videos to play on iTunes now.Free Download Dimo Video Converter Ultimate for Mac/Win:
 Other Download:
Convert MP4 movies to iTunes (iTunes 12) on macos SierraStep 1. Just install the program, then head to the folder where the MOV files are stored. Add the files to MP4 video converter by clicking "Add File" or directly drag & drop. Step 2. Click "Select Format" bar to open the output format window. In the "Format > Video" category, you'll find iTunes supported MP4, MOV, M4V format, just choose it as the output format. To enable these files fully compatible with iTunes, manual settings are required.Tips: 1. If you import MP4 to iTunes for syncing to your iPhone, iPod or iPad for play back, you can directly choose the iPhone/iPod/iPad preset. In this case, no manual settings required.2. You are able to set the parameters for your files by clicking on Settings button, such as video and audio codec, video size, bit rate, frame rate, audio channel and so on. You can compress your MP4 for playback smoothly before conversion.Step 3. Once you have all the right settings, you would click the "Start" button to complete the MP4 to iTunes conversion process. After conversion, click Open to find the output iTunes videos. Now it would be easy to transfer the converted videos into your iTunes library and even sync to Apple devices.Additional Tip: For new iTunes 12, there's little difference with the previous version. You can learn how to add videos to iTunes 12 in detail.1. Start iTunes 12.2. Click File > Add File to Library.3. Click View and select Movies, then your movie library will be presented.4. Click Home Videos and now you can find your transferred videos. In this interface, you can also directly drag and drop local video files.Free Download or Purchase Dimo Video Converter Ultimate for Mac/Win:
Other Download:
Convert MP4 movies to iTunes (iTunes 12) on macos SierraStep 1. Just install the program, then head to the folder where the MOV files are stored. Add the files to MP4 video converter by clicking "Add File" or directly drag & drop. Step 2. Click "Select Format" bar to open the output format window. In the "Format > Video" category, you'll find iTunes supported MP4, MOV, M4V format, just choose it as the output format. To enable these files fully compatible with iTunes, manual settings are required.Tips: 1. If you import MP4 to iTunes for syncing to your iPhone, iPod or iPad for play back, you can directly choose the iPhone/iPod/iPad preset. In this case, no manual settings required.2. You are able to set the parameters for your files by clicking on Settings button, such as video and audio codec, video size, bit rate, frame rate, audio channel and so on. You can compress your MP4 for playback smoothly before conversion.Step 3. Once you have all the right settings, you would click the "Start" button to complete the MP4 to iTunes conversion process. After conversion, click Open to find the output iTunes videos. Now it would be easy to transfer the converted videos into your iTunes library and even sync to Apple devices.Additional Tip: For new iTunes 12, there's little difference with the previous version. You can learn how to add videos to iTunes 12 in detail.1. Start iTunes 12.2. Click File > Add File to Library.3. Click View and select Movies, then your movie library will be presented.4. Click Home Videos and now you can find your transferred videos. In this interface, you can also directly drag and drop local video files.Free Download or Purchase Dimo Video Converter Ultimate for Mac/Win:
 Need the lifetime version to work on 2-4 Macs so that your friends and family can instantly broaden their entertainment options? Please refer to the family license here. Kindly Note:The price of Dimo Video Converter Ultimate for Mac is divided into 1 Year Subscription, Lifetime/Family/Business License: $43.95/Year; $45.95/lifetime license; $95.95/family license(2-4 Macs); $189.95/business pack(5-8 Macs). Get your needed one at purchase page.Related Software:BDmate (Mac/Win)Lossless backup Blu-ray to MKV with all audio and subtitle tracks; Rip Blu-ray to multi-track MP4; Convert Blu-ray to almost all popular video/audio formats and devices; Copy Blu-ray to ISO/M2TS; Share digitized Blu-ray wirelessly.DVDmate (Mac/Win)A professional DVD ripping and editing tool with strong ability to remove DVD protection, transcode DVD to any video and audio format, and edit DVD to create personal movie.Videomate (Mac/Win)An all-around video converter software program that enables you to convert various video and audio files to formats that are supported by most multimedia devices.8K Player (Mac/Win)A mixture of free HD/4K video player, music player, Blu-ray/DVD player, video recorder and gif maker. Contact us or leave a message at Facebook if you have any issues.Related Articles:
Source: MP4 to iTunes: Solve "Can't Import MP4 Files into iTunes"
Need the lifetime version to work on 2-4 Macs so that your friends and family can instantly broaden their entertainment options? Please refer to the family license here. Kindly Note:The price of Dimo Video Converter Ultimate for Mac is divided into 1 Year Subscription, Lifetime/Family/Business License: $43.95/Year; $45.95/lifetime license; $95.95/family license(2-4 Macs); $189.95/business pack(5-8 Macs). Get your needed one at purchase page.Related Software:BDmate (Mac/Win)Lossless backup Blu-ray to MKV with all audio and subtitle tracks; Rip Blu-ray to multi-track MP4; Convert Blu-ray to almost all popular video/audio formats and devices; Copy Blu-ray to ISO/M2TS; Share digitized Blu-ray wirelessly.DVDmate (Mac/Win)A professional DVD ripping and editing tool with strong ability to remove DVD protection, transcode DVD to any video and audio format, and edit DVD to create personal movie.Videomate (Mac/Win)An all-around video converter software program that enables you to convert various video and audio files to formats that are supported by most multimedia devices.8K Player (Mac/Win)A mixture of free HD/4K video player, music player, Blu-ray/DVD player, video recorder and gif maker. Contact us or leave a message at Facebook if you have any issues.Related Articles:
Source: MP4 to iTunes: Solve "Can't Import MP4 Files into iTunes"
The article shows an easy way to copy DVD library to Amazon Cloud with best format settings so that you can watch DVD via Amazon Cloud with ease.After 2012 Skyfall, Spectre creates another box office success (up to $900 million worldwide) and embraces overall possitive reviews. With the DVD version of Spectre 007 being new released, you have one more option to watch this fantastic action movie-watch Spectre 007 DVD movie. To share your Spectre DVD disc with all your family and friends, you can make full use of Amazon Drive cloud storage and make a digital copy of Spectre DVD onto Amazon Cloud so as the Spectre 007 DVD movie can be transferred to iPhone iPad Android, TV for unlimited movie experience.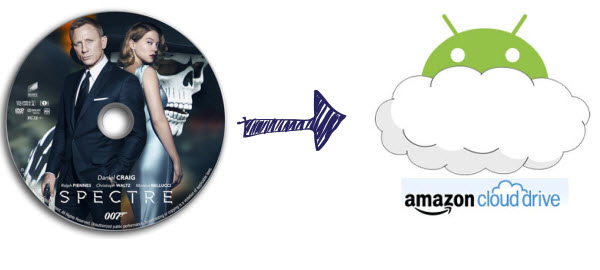 So how to upload Spectre DVD to Amazon Cloud? Searching high and low, I know that it's easy to do it as long as got a DVD Ripper in hand. Dimo Video Converter Ultimate for Mac is highly recommended here to fulfill your needs. It can professionally convert DVD to Amazon Cloud compatible MP4, MOV, AVI, WMV, FLV files with fast speed and excellent output quality on Mac (OS Sierra). In addition, this DVD Ripping software can also rip DVD to optimized video for playback on iPad, iPod, iPhone, Xbox, PS3, PS4, TV, VR, Android, FCP and more. With a built-in video editor, you are able to change the DVD movies according to your taste- add watermarks, rotate, crop, change video visual effects and even trim the long videos into multiple segments with short duration. The most important is that, it allows you to modify the video bitrate, frame rate, video size, audio channel, etc for your original large video clips for easier uploading. If you are a Windows user, please turn to Dimo Video Converter Ultimate to convert and upload DVD to Amazon Cloud on Windows PC (including Windows 10). Now download the right version of the program and follow the guide below.Free Download Dimo Video Converter Ultimate for Mac/Win: Other Download:
Guides about ripping Spectre DVD for uploading to Amazon CloudStep 1. Load Spectre DVD moviesInsert the Spectre DVD disc into your computer's DVD drive and run DVD Ripper. You can load the DVD movies by clicking "Add DVD" button on the top left. This DVD converter also supports ripping ISO and Video_ts folder.Tip: If you need to backupSpectre DVD with wanted audio track, you can click the drop down menu after "Audio" to select your desired tracks.
So how to upload Spectre DVD to Amazon Cloud? Searching high and low, I know that it's easy to do it as long as got a DVD Ripper in hand. Dimo Video Converter Ultimate for Mac is highly recommended here to fulfill your needs. It can professionally convert DVD to Amazon Cloud compatible MP4, MOV, AVI, WMV, FLV files with fast speed and excellent output quality on Mac (OS Sierra). In addition, this DVD Ripping software can also rip DVD to optimized video for playback on iPad, iPod, iPhone, Xbox, PS3, PS4, TV, VR, Android, FCP and more. With a built-in video editor, you are able to change the DVD movies according to your taste- add watermarks, rotate, crop, change video visual effects and even trim the long videos into multiple segments with short duration. The most important is that, it allows you to modify the video bitrate, frame rate, video size, audio channel, etc for your original large video clips for easier uploading. If you are a Windows user, please turn to Dimo Video Converter Ultimate to convert and upload DVD to Amazon Cloud on Windows PC (including Windows 10). Now download the right version of the program and follow the guide below.Free Download Dimo Video Converter Ultimate for Mac/Win: Other Download:
Guides about ripping Spectre DVD for uploading to Amazon CloudStep 1. Load Spectre DVD moviesInsert the Spectre DVD disc into your computer's DVD drive and run DVD Ripper. You can load the DVD movies by clicking "Add DVD" button on the top left. This DVD converter also supports ripping ISO and Video_ts folder.Tip: If you need to backupSpectre DVD with wanted audio track, you can click the drop down menu after "Audio" to select your desired tracks. 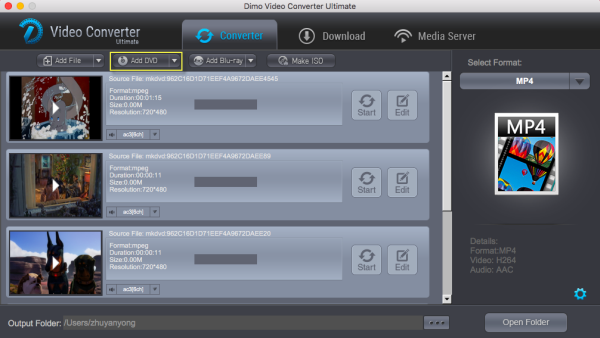 Step 2. Choose output formatClick "Select Format" bar and select the appropriate format. Since Amazon Cloud supports MP4, Quicktime, AVI, MTS, MPG, ASF, WMV, Flash, and OGG video/audio files, just select the one you need as the output format from "Format > Video" or "Format > HD Video" category. Or depends on your device, you can choose a suitable video format from "Device".Step 3. Advanced profile settingsSimply click Settings bar and you can tweak the settings to your satisfaction and even save it as preset. Please remember the file size is based more on bitrate than resolution which means bitrate higher results in bigger file size, and lower visible quality loss.
 Step 4. Edit/Split Spectre DVD movieClick Edit button and you can trim, crop or adjust the video with the built-in video editor to get the very part and effect of the movie you want.Tip: Keep in mind that Amazon Drive streaming is not available for videos longer than 20 minutes or larger than 2 GB, but these can be stored in Amazon Drive for you to download and watch offline. (See Amazon Drive Photos & Videos File Requirements)Step 4. Start rippingSpectre DVD to Amazon CloudAfter the above three steps, go back to the main interface and click the "Start" button to begin convertingSpectre DVD movies to Amazon Cloud highly compatible video files. Just copy the converted file to Amazon Cloud after the conversion process is complete. Enjoy.Note: Some file names are not compatible with Amazon Drive. If your file name contains incompatible characters, you will need to rename it before you can upload it.To upload photos and personal videos from your computer to Cloud Drive:1. Go to Amazon Cloud Drive.2. Click the Photos & Videos tab in the top navigation bar.3. Drag and drop files into the browser window, or click Upload and follow the onscreen instructions.Tip: After clicking Upload, you can use the Select Photos and Videos button to choose multiple files to upload. Uploading folders is not currently available within the Cloud Drive website.Your uploaded photos and personal videos are automatically available on the Cloud Drive Photos & Videos website, and are accessible from PC and Mac computers through a web browser. Choose to open and play the video using the Amazon Cloud player. Free Download or Purchase Dimo Video Converter Ultimate for Mac: Contact us or leave a message at Facebook if you have any issues.Related Articles:
Source: How can I Upload Spectre DVD to Amazon Cloud
Step 4. Edit/Split Spectre DVD movieClick Edit button and you can trim, crop or adjust the video with the built-in video editor to get the very part and effect of the movie you want.Tip: Keep in mind that Amazon Drive streaming is not available for videos longer than 20 minutes or larger than 2 GB, but these can be stored in Amazon Drive for you to download and watch offline. (See Amazon Drive Photos & Videos File Requirements)Step 4. Start rippingSpectre DVD to Amazon CloudAfter the above three steps, go back to the main interface and click the "Start" button to begin convertingSpectre DVD movies to Amazon Cloud highly compatible video files. Just copy the converted file to Amazon Cloud after the conversion process is complete. Enjoy.Note: Some file names are not compatible with Amazon Drive. If your file name contains incompatible characters, you will need to rename it before you can upload it.To upload photos and personal videos from your computer to Cloud Drive:1. Go to Amazon Cloud Drive.2. Click the Photos & Videos tab in the top navigation bar.3. Drag and drop files into the browser window, or click Upload and follow the onscreen instructions.Tip: After clicking Upload, you can use the Select Photos and Videos button to choose multiple files to upload. Uploading folders is not currently available within the Cloud Drive website.Your uploaded photos and personal videos are automatically available on the Cloud Drive Photos & Videos website, and are accessible from PC and Mac computers through a web browser. Choose to open and play the video using the Amazon Cloud player. Free Download or Purchase Dimo Video Converter Ultimate for Mac: Contact us or leave a message at Facebook if you have any issues.Related Articles:
Source: How can I Upload Spectre DVD to Amazon Cloud
Ripping DVD and add them to Plex is very simple. This page shows an easy way to get DVDs into Plex server for streaming across multiple devices easily.We all know that Plex allows you to aggregate all your personal media and access it anywhere you go. You are able to enjoy your own media on all your devices with the Plex Media Server. If you like me have 800-900 DVDs and want to put them into some format so you can share them into Plex, just read on this article. I will share the tips and tricks for copying your DVD collection to Plex Media Server for streaming and playing on TV. Since Plex has maked it clear in its supported sources list and DVD format is not listed. The possible solution is to use a DVD ripping tool to rip DVD to Plex/TV playable video format and stream it to TV for playback. Though there are many DVD rippers for Plex, the best and most suitable among them is Dimo Video Converter Ultimate. This DVD Ripping program offers specified video formats for TV and many other game hardware like iPhone, iPad, Android, PSP, PS4 Pro/PS4/PS3, Xbox One S/Xbox One/Xbox 360, PS Vita, Wii and more bypassing the CSS, Region, RCE, Sony ARccOS and PuppetLock or some other DVD protection. With it, you can easily convert, edit, view and save all your DVD disc in a format that can be easily streamed and played from Plex with the highest possible playback video quality, even original AC3 5.1 sound can be kept for Plex pass-through. If you're using a Mac, please turn to DVD Ripper for Mac from Dimo, which enables you to rip DVD to Plex Media Server on Mac OS (Sierra included).The process is straightforward. After downloading, follow the wizard to install and run the program. Then follow the steps below to rip DVD to Plex supported file formats in a few clicks!Free Download Dimo Video Converter Ultimate (Win/Mac): Other Download:
Tutorial: Ripping DVDs to Plex for Streaming to TVStep 1: Insert your DVD disc into your DVD-ROM, run the DVD Ripper and click "Add DVD" icon to load movies. You can also import movies files from DVD Video_ts folder, ISO. You can click on the dropdown list of “Audio track” to select your needed track so that you can view DVD movies with proper audio channel.
Since Plex has maked it clear in its supported sources list and DVD format is not listed. The possible solution is to use a DVD ripping tool to rip DVD to Plex/TV playable video format and stream it to TV for playback. Though there are many DVD rippers for Plex, the best and most suitable among them is Dimo Video Converter Ultimate. This DVD Ripping program offers specified video formats for TV and many other game hardware like iPhone, iPad, Android, PSP, PS4 Pro/PS4/PS3, Xbox One S/Xbox One/Xbox 360, PS Vita, Wii and more bypassing the CSS, Region, RCE, Sony ARccOS and PuppetLock or some other DVD protection. With it, you can easily convert, edit, view and save all your DVD disc in a format that can be easily streamed and played from Plex with the highest possible playback video quality, even original AC3 5.1 sound can be kept for Plex pass-through. If you're using a Mac, please turn to DVD Ripper for Mac from Dimo, which enables you to rip DVD to Plex Media Server on Mac OS (Sierra included).The process is straightforward. After downloading, follow the wizard to install and run the program. Then follow the steps below to rip DVD to Plex supported file formats in a few clicks!Free Download Dimo Video Converter Ultimate (Win/Mac): Other Download:
Tutorial: Ripping DVDs to Plex for Streaming to TVStep 1: Insert your DVD disc into your DVD-ROM, run the DVD Ripper and click "Add DVD" icon to load movies. You can also import movies files from DVD Video_ts folder, ISO. You can click on the dropdown list of “Audio track” to select your needed track so that you can view DVD movies with proper audio channel.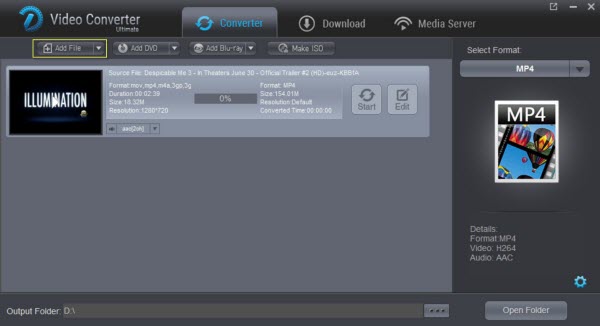 Step 2: Click "Select Format" bar and choose MP4 from "Format > Video" or "Format > HD Video", which can be recognized by Plex well. MKV is also a good choice; as a container format it takes whatever you give it.Note: The output format is preferably in a common format, like MP3 for audio, MPEG-4 for video. The more common format you use, the more devices you can stream to. For example, if you use FLAC instead of MP3 for your music, you can't stream to your Xbox. Just keep in mind that not all devices support all formats of media.Step 3: If you like, you can click "Settings" to change the video encoder, resolution, frame rate, etc. as you wish. Keep in mind the file size and video quality is based more on bitrate than resolution which means bitrate higher results in big file size, and lower visible quality loss, and vice versa. With the right settings you can retain the quality of the original DVD while also saving space. This is particularly helpful when streaming over your network, depending on your network quality. Step 4: Click the “Start” button under the preview window, and the DVD ripper will start the conversion from DVD movies to Plex Media Server. Once the conversion finished, get the ripped DVD files onto Plex Media Server easily. Now you can stream DVD movies through Plex to smart TV, Apple TV, Xbox, Roku, Google TV, iPad, Samsung Galaxy Tab, PS4 Pro, computer/tablet/smartphone or other connected DLNA devices for great enjoyment both home and away. You can backup DVD to NAS or cloud before streaming.Free Download or Purchase Dimo Video Converter Ultimate:
 Need the lifetime version to work on 2-4 PCs so that your friends and family can instantly broaden their entertainment options? Please refer to the family license here. Kindly Note:The price of Dimo Video Converter Ultimate for Windows is divided into 1 Year Subscription, Lifetime/Family/Business License: $43.95/Year; $45.95/lifetime license; $95.95/family license(2-4 PCs); $189.95/business pack(5-8 PCs). Get your needed one at purchase page.Related Software:BDmate (Win/Mac)Lossless backup DVD to MKV with all audio and subtitle tracks; Rip DVD to multi-track MP4; ConvertDVD to almost all popular video/audio formats and devices; Copy DVD to ISO/M2TS; Share digitized DVD wirelessly.DVDmate (Win/Mac)A professional DVD ripping and editing tool with strong ability to remove DVD protection, transcode DVD to any video and audio format, and edit DVD to create personal movie.Videomate (Win/Mac)An all-around video converter software program that enables you to convert various video and audio files to formats that are supported by most multimedia devices.8K Player (Win/Mac)A mixture of free HD/4K video player, music player, DVD/DVD player, video recorder and gif maker. Contact us or leave a message at Facebook if you have any issues.Related Articles:
Source: Copy DVD to Plex Media Server for TV and other DLNA devices
Need the lifetime version to work on 2-4 PCs so that your friends and family can instantly broaden their entertainment options? Please refer to the family license here. Kindly Note:The price of Dimo Video Converter Ultimate for Windows is divided into 1 Year Subscription, Lifetime/Family/Business License: $43.95/Year; $45.95/lifetime license; $95.95/family license(2-4 PCs); $189.95/business pack(5-8 PCs). Get your needed one at purchase page.Related Software:BDmate (Win/Mac)Lossless backup DVD to MKV with all audio and subtitle tracks; Rip DVD to multi-track MP4; ConvertDVD to almost all popular video/audio formats and devices; Copy DVD to ISO/M2TS; Share digitized DVD wirelessly.DVDmate (Win/Mac)A professional DVD ripping and editing tool with strong ability to remove DVD protection, transcode DVD to any video and audio format, and edit DVD to create personal movie.Videomate (Win/Mac)An all-around video converter software program that enables you to convert various video and audio files to formats that are supported by most multimedia devices.8K Player (Win/Mac)A mixture of free HD/4K video player, music player, DVD/DVD player, video recorder and gif maker. Contact us or leave a message at Facebook if you have any issues.Related Articles:
Source: Copy DVD to Plex Media Server for TV and other DLNA devices
This guide lead you to convert DVD to Google Cardboard supported video so that you can play DVD on Google Cardboard with virtual reality experience. Google Cardboard, another excellent virtual reality headset followed with Samsung Gear VR, Zeiss VR One, has gained widespread reputations amongest 3D lovers, not only because of its lower price, but also its powerful compatibility with nearly any smartphones including Android and iPhone. If you happen to have a bunch of DVD collections at home, it's a pity for you can not get them on your Andorid/iOS devices through Google Cardboard with 3D Effects. In this article, I'll glad to share some useful tips to help you move your DVD medias into Google Cardboard for viewing freely on your smartphone. As a matter of fact, Google Cardboard lacks ability to play DVD movies but it can play Side-by-Side MP4 videos. So in order to watch DVD in Google Cardboard, firstly you'll rip and convert DVDs to SBS MP4 videos. To do this, you can use Dimo Video Converter Ultimate for Mac. With it, you can convert 2D DVD as well as 2D/3D Blu-ray to Google Cardboard supported side-by-side video files with lossless quality. In addition, it offers other 3D videos as MKV Top-bottom 3D video, MP4 top-bottom 3D video, MKV side-by-side 3D video, which can play on Gear VR, VR One, Oculus Rift DK2, PS VR, Google DayDream View etc. perfectly.Free Download Dimo Video Converter Ultimate for Mac/Win: Other Download:
Ripping DVD for viewing in Google Cardboard is simple as ABC. After downloading, follow the wizard to install and run the program. Then follow the steps below to convert DVD to MP4/MKV SBS video. The below guide takes DVD Ripper for Windows (macos Sierra compatible) screenshots for example. If you're using a Windows PC, simply turn to Dimo Video Converter Ultimate, which has the same function as the Mac version. Keep in mind that you have download the rght version, Mac OS .dmg files cannot be installed on Windows platform – and vice versa.Simple Steps to Rip DVD for watching on Google Cardboarda: Load DVD moviesInsert your DVD disc into your DVD-ROM, run Dimo DVD to VR video converter and click "Add DVD" icon to load DVD movies.b: Choose output formatClick the format bar to follow "Format > Video" and choose the MP4 or MOV format which can fit your Google Cardboard or mobile phone perfectly.Tip: If you like, you can click "Settings" which is next to "Format", free change your target video size, bitrate, frame rate and 3D depth. If you want to get best video quality, pls switch them to "original".c: Select 3D effects Click on "Edit" > 3D and choose 3D effect (Red-Blue, Left-Right, Top-Bottom three modes) from the option. Here "Left-Right" can be set to get a side-by-side video. You are able to get immediate preview of 3D effect within the built-in player. 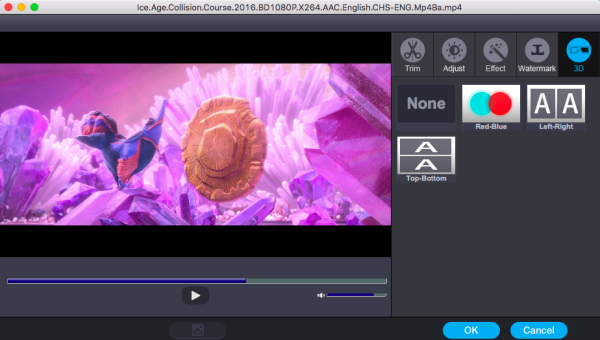 c: Start DVD rippingClick the "Start" button, and the DVD ripper will start the conversion from DVD movies to 3D SBS video for Google Cardboard. After conversion, open output file destination, locate the created SBS 3D MP4 video and you could view the ripped DVD movies in Google Cardboard via iPhone/Android as you want. You can adjust your phone left or right in your Cardboard holder to help to maximize the 3D depth as well as focus the viewing area as closely to the center of the screen as possible.Note: You'll have to download the compatible iOS or Android VR player apps that are capable of projecting stereoscopic content. Learn more and get your own Cardboard viewer at http://g.co/cardboard.Free Download or Purchase Dimo Video Converter Ultimate for Mac/Win: Need the lifetime version to work on 2-4 Macs so that your friends and family can instantly broaden their entertainment options? Please refer to the family license here. Kindly Note:The price of Dimo Video Converter Ultimate for Mac is divided into 1 Year Subscription, Lifetime/Family/Business License: $43.95/Year; $45.95/lifetime license; $95.95/family license(2-4 Macs); $189.95/business pack(5-8 Macs). Get your needed one at purchase page.Related Software:BDmate (Mac/Win)Lossless backup Blu-ray to MKV with all audio and subtitle tracks; Rip Blu-ray to multi-track MP4; Convert Blu-ray to almost all popular video/audio formats and devices; Copy Blu-ray to ISO/M2TS; Share digitized Blu-ray wirelessly.DVDmate (Mac/Win)A professional DVD ripping and editing tool with strong ability to remove DVD protection, transcode DVD to any video and audio format, and edit DVD to create personal movie.Videomate (Mac/Win)An all-around video converter software program that enables you to convert various video and audio files to formats that are supported by most multimedia devices.8K Player (Mac/Win)A mixture of free HD/4K video player, music player, Blu-ray/DVD player, video recorder and gif maker. Contact us or leave a message at Facebook if you have any issues.Related Articles:
Source: Watch DVD Movies on Google Cardboard via Android/iPhone Handset
c: Start DVD rippingClick the "Start" button, and the DVD ripper will start the conversion from DVD movies to 3D SBS video for Google Cardboard. After conversion, open output file destination, locate the created SBS 3D MP4 video and you could view the ripped DVD movies in Google Cardboard via iPhone/Android as you want. You can adjust your phone left or right in your Cardboard holder to help to maximize the 3D depth as well as focus the viewing area as closely to the center of the screen as possible.Note: You'll have to download the compatible iOS or Android VR player apps that are capable of projecting stereoscopic content. Learn more and get your own Cardboard viewer at http://g.co/cardboard.Free Download or Purchase Dimo Video Converter Ultimate for Mac/Win: Need the lifetime version to work on 2-4 Macs so that your friends and family can instantly broaden their entertainment options? Please refer to the family license here. Kindly Note:The price of Dimo Video Converter Ultimate for Mac is divided into 1 Year Subscription, Lifetime/Family/Business License: $43.95/Year; $45.95/lifetime license; $95.95/family license(2-4 Macs); $189.95/business pack(5-8 Macs). Get your needed one at purchase page.Related Software:BDmate (Mac/Win)Lossless backup Blu-ray to MKV with all audio and subtitle tracks; Rip Blu-ray to multi-track MP4; Convert Blu-ray to almost all popular video/audio formats and devices; Copy Blu-ray to ISO/M2TS; Share digitized Blu-ray wirelessly.DVDmate (Mac/Win)A professional DVD ripping and editing tool with strong ability to remove DVD protection, transcode DVD to any video and audio format, and edit DVD to create personal movie.Videomate (Mac/Win)An all-around video converter software program that enables you to convert various video and audio files to formats that are supported by most multimedia devices.8K Player (Mac/Win)A mixture of free HD/4K video player, music player, Blu-ray/DVD player, video recorder and gif maker. Contact us or leave a message at Facebook if you have any issues.Related Articles:
Source: Watch DVD Movies on Google Cardboard via Android/iPhone Handset